Wanna see something cool? Check out Angular Spotify 🎧
Angular Jira Clone Part 03 - Setup Akita state management
My third tutorial for jira.trungk18.com will go further into the application state management with Akita.
See all tutorials for Jira clone
State management overview
State management makes the state of your app tangible in the form of a data structure that you can read from and write to. It makes your ‘invisible’ state clearly visible for you to work with.
What is state?
I took some ideas from What is state? Why do I need to manage it? by Raquel Moss
You might have a different definition for “state” though:
- The data (whatever that is!).
- All the variables in all the components.
- All the variables in the entire application.
- A store, like a Redux or Flux store.
- The behavior of the app at a given moment in time (this is my definition!). Or in the other words, the output of all the actions that the user has taken since the page loaded.
For example, I load a page with a button on it. I click this button to make an HTTP request. The HTTP request fails and there should be an error display on the screen.
What is the action? A button was clicked, it sent a request, and the request was failed. What is the outcome? An error message.
The old way is you will store the error message inside the component itself. But what if you want other components to display this error instead? It will lead to the need of sharing data between different components.
If we were to describe a shared object that holds all of the application data, it might look like:
const state = {
  error: 'There was an error while fetching the data. Please try again',
}
Imagine you have some sort of service that store this data instead of storing it on the local state of the component. This means others will also be able to access it as well, right?
What is state management?
State management library provides us with tools to create the data structure as we mentioned above, and a way to update them when the new actions occur. You could use a simple service for that purpose. But when the application is getting more complicated, you would want to have state management, seriously.
Without a state management system, how do we know what the state of our application is? We look at the DOM. We can check DOM elements to see if they have certain classes (‘active’, ‘error’), or to check whether certain elements exist, or manually debug your code and do console.log.
With a state management system, to find out what the state of our application is, we check our state data structure inside their compatible development tool. The UI should reflect the data, but the data is the Source Of Truth
Why would I want to use state management?
To synchronize the data model and the UI has always been a difficult task previously. If you work with jQuery, every click that update the UI, you also have to update the JavaScript data model. All of the new UI frameworks included Angular/React or Vue made this much easier by only updating the data, and they will reflect the changes to the UI.
Say you have a boolean to display a component based on that value. If it is true, you display the button and vice versa. With Angular, you only need to toggle the boolean on UI change, the display of component will be automatically handled (assume that you still attach the change detector of the UI framework)
You have to realize that there is always a state of an application - data get loaded from the server, some parameters on the URL, users perform actions and things change in response to those actions.
When you’re creating larger and more complex JavaScript applications, having explicit data to work with predictably is a huge boon to developers. It’s much easier to reason about and manipulate, and it’s less bug-prone (though of course, you can still create a lot of bugs with any code you write with a state management system).
When you should use state management?
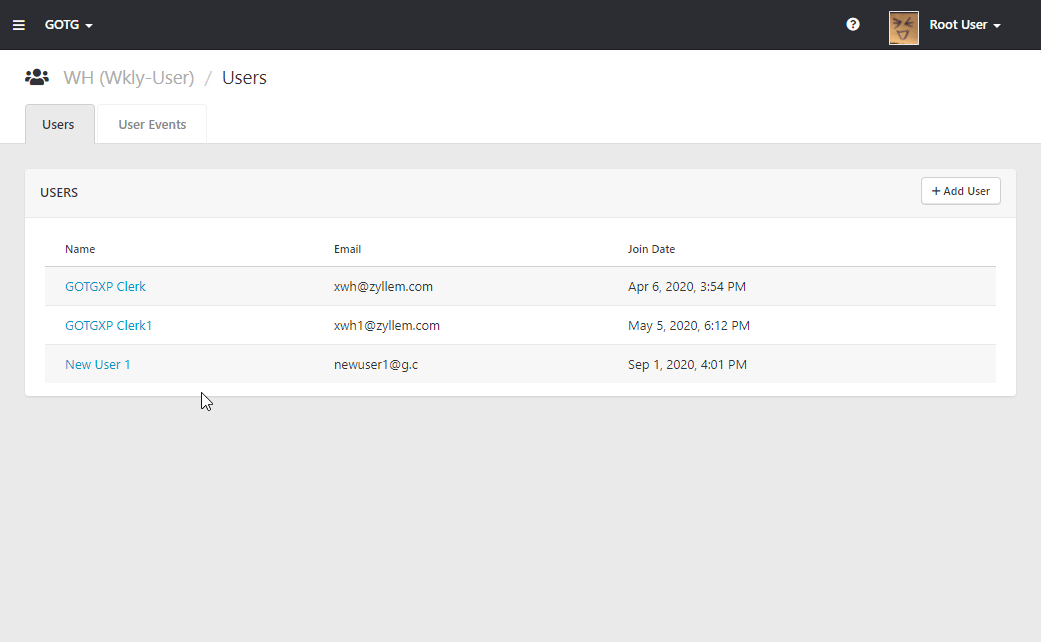
I use state management when I have a tree of components with many layers that need to interact with the same piece of data over time. See the screenshot capture from my jira.trungk18.com

I have at least 5 levels of the component hierarchy. When I first load the application, the data was fetched at the first level component - ProjectComponent. And on the fifth level component - BoardDndListComponent, I need to access to the data from the first level component as well.
So if you only do Input and Output to pass the data between component, it will be a nightmare to handle the data change, you have to pass the data through 5 different levels and some component in the middle might not need the data at all, but because the fifth level needs it, so the data need to go through the whole flow. Think about it like

That’s when you want to have a state management in your application. If you have one, it will look like. Basically, if any component wanted to get the data, it will talk directly to the state management. You will see how it looks later on when I go deeper to Akita.

When you should not use state management?
For some simple application like CRUD, say you have:
- A component to display a list of resource
- A detail view that will open when you select an item from the resource list
- A form when you click edit somewhere on the detail view
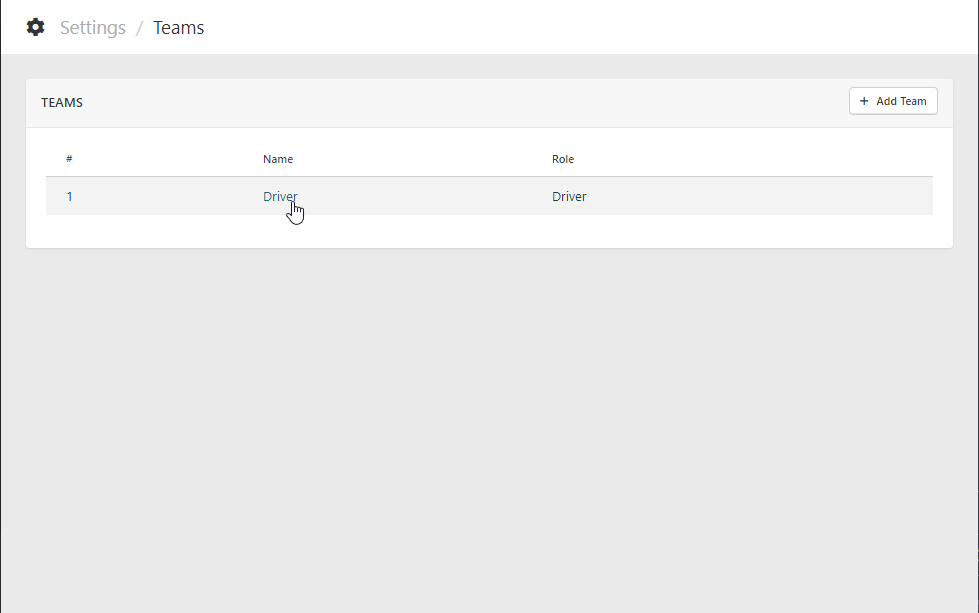
If you think about it, you don’t need state management for this kind of application. Because usually each component I mentioned above was configured with their route and only display a single component at the same time. I would rather make a direct API call to the server every time the view is loaded than store it on the state management. Below was one of the similar application that I built without state management at Zyllem.
Still CRUD app, but multiple components nested through tabbed view as below screenshot. You would want to have state management 😂 So it is really depends your requirement.
Remember that you’re building something for your company, your product, and your customers. The business rules and relationships within your product, company, and industry are far more important then whether or not you force a state management into your app!
Integrate Akita to Jira Clone
What is Akita?
Akita is a state management pattern, built on top of RxJS, which takes the idea of multiple data stores from Flux and the immutable updates from Redux, along with the concept of streaming data, to create the Observable Data Store model.
Akita encourages simplicity. It saves you the hassle of creating boilerplate code and offers powerful tools with a moderate learning curve, suitable for both experienced and inexperienced developers alike.
That’s why I decided to go with Akita for Jira clone.
Jira clone simple interactive flow with Akita

I set up a project state with initial data. The main heavy lifting part I think is the project service, it contains all the interacting with project store. Such as after fetching the project successfully, I update the store immediately inside the service itself. The last lego block was to expose the data through project query. Any components can start to inject project query and consume data from there.
If you are using ngrx, you have to dispatch an action when you started fetching the project, and then there is an effect somewhere that was detached from your context need to handle the action, send a request to the API server. And finally, the effect will tell whether the data was successfully fetched or not. There is nothing wrong with ngrx approach, it is just too much concept and layer that you need to understand. To be honest, I used to afraid of integrating ngrx in my project because of the unnecessary complexity it would bring.
1. Install Akita
Follow the installation guide to add Akita to Angular CLI project. Simple run
ng add @datorama/akitaIt will ask you some questions and did a bunch of work for you. Just selected what you need, I don’t want the Router store and Firebase.

2. Set up project store
A Store is a single object which contains the store state and serves as the single source of truth.
To create a store, you need to extend Akita’s Store, passing the type as well as its initial state. See how I create my project store.
export interface ProjectState extends JProject {}

function createInitialState(): ProjectState {
  return {
    issues: [],
    users: [],
  } as ProjectState
}

@Injectable({
  providedIn: 'root',
})
@StoreConfig({
  name: 'project',
})
export class ProjectStore extends Store<ProjectState> {
  constructor() {
    super(createInitialState())
  }
}
That’s how my JProject model looks like:
export interface JProject {
  id: string
  name: string
  url: string
  description: string
  category: ProjectCategory
  createdAt: string
  updateAt: string
  issues: JIssue[]
  users: JUser[]
}
This object has everything I need to display the UI. In reality, it might be much more different because this object could be big. It will increase the fetching time from the server that leads to a slow response to the user. You might want to break it into different API calls in the actual application. I set the initial issues and users to be an empty array. Next, you want to query the data from the store.
2. Set up project query
A Query is a class offering functionality responsible for querying the store. You can think of the query as being similar to database queries. Its constructor function receives as parameters its store and possibly other query classes.
Queries can talk to other queries, join entities from different stores, etc. To create a Query, you need to extend the Query class from Akita:
export class ProjectQuery extends Query<ProjectState> {
  constructor(protected store: ProjectStore) {
    super(store)
  }

  isLoading$ = this.selectLoading()
  all$ = this.select()
  issues$ = this.select('issues')
  users$ = this.select('users')

  issueByStatusSorted$ = (status: IssueStatus): Observable<JIssue[]> => {
    return this.issues$.pipe(
      map(issues => {
        let filteredIssues = issues
          .filter(x => x.status === status)
          .sort((a, b) => a.listPosition - b.listPosition)
        return filteredIssues
      })
    )
  }
}
Here I have a few selectors for displaying into the UI. I need to also filter a list of issues before sending them to each lane (Backlog, In Progress, and the link), using a simple RxJS operator helps me to do so easily. Now come to the important part, update the store on performing some action. You need a service for that purpose.
3. Set up project service
In the project service, we’ll update the store when
- Make our API calls
- Interact with the UI
- Drag and drop issue
- Update issue
- and so on
Anything that will result in a data change, you have to do it inside the service. You should not modify the object on the local component itself.
@Injectable({
  providedIn: 'root',
})
export class ProjectService {
  baseUrl: string

  constructor(private _http: HttpClient, private _store: ProjectStore) {
    this.baseUrl = environment.apiUrl
  }

  setLoading(isLoading: boolean) {
    this._store.setLoading(isLoading)
  }

  getProject() {
    this._http
      .get<JProject>(`${this.baseUrl}/project.json`)
      .pipe(
        setLoading(this._store),
        tap(project => {
          this._store.update(state => {
            return {
              ...state,
              ...project,
            }
          })
        }),
        catchError(error => {
          this._store.setError(error)
          return of(error)
        })
      )
      .subscribe()
  }
}
4. Use Store and Service for update data
After finishing set up three pillars: store, query, and service. Each one of them is marked as @Injectable({ providedIn: 'root' }). It means that the store, the query, and the service are app-wide singletons, and therefore can be accessed everywhere in our application. For example, in components, directives, services, and queries.
You can start using them into your component by injecting it into the component constructor. See how I render the list of issues to the UI and update them on drag and drop.
export class BoardDndComponent implements OnInit {
  issueStatuses: IssueStatus[] = [
    IssueStatus.BACKLOG,
    IssueStatus.SELECTED,
    IssueStatus.IN_PROGRESS,
    IssueStatus.DONE,
  ]

  constructor(public projectQuery: ProjectQuery, public authQuery: AuthQuery) {}

  ngOnInit(): void {}
}<div class="flex container mt-7" cdkDropListGroup>
<div
class="board-dnd-list"
board-dnd-list
*ngFor="let status of issueStatuses"
[status]="status"
[currentUserId]="authQuery.userId$ | async"
[issues$]="projectQuery.issueByStatusSorted$(status)"
></div>
</div>export class BoardDndListComponent implements OnInit {
IssueStatusDisplay = IssueStatusDisplay
@Input() status: IssueStatus
@Input() currentUserId: string
@Input() issues$: Observable<JIssue[]>
issues: JIssue[] = []
get issuesCount(): number {
return this.issues.length
}
constructor(
private _projectService: ProjectService,
private _filterQuery: FilterQuery
) {}
ngOnInit(): void {
combineLatest([this.issues$, this._filterQuery.all$])
.pipe(untilDestroyed(this))
.subscribe(([issues, filter]) => {
this.issues = this.filterIssues(issues, filter)
})
}
drop(event: CdkDragDrop<JIssue[]>) {
let newIssue: JIssue = { ...event.item.data }
let newIssues = [...event.container.data]
if (event.previousContainer === event.container) {
moveItemInArray(newIssues, event.previousIndex, event.currentIndex)
this.updateListPosition(newIssues)
} else {
transferArrayItem(
event.previousContainer.data,
newIssues,
event.previousIndex,
event.currentIndex
)
this.updateListPosition(newIssues)
newIssue.status = event.container.id as IssueStatus
this._projectService.updateIssue(newIssue)
}
}
}That’s all for part 3. Any questions, you can leave it on the comment box below or reach me on Twitter. Thanks for stopping by!
Published 1 Sep 2020