Wanna see something cool? Check out Angular Spotify 🎧
Angular Jira Clone Part 04 - Build an editable textbox
My fourth tutorial for jira.trungk18.com will focus on the first custom UI element - editable textbox. This time we will go deeper inside the code and do a step by step tutorial.
See all tutorials for Jira clone
Requirement
That’s how an editable textbox should look

- When displaying the text, it should look like a paragraph
- When hovering over the text, there should be a different background to tell the user that it is editable!
- Upon clicking into the background, it will be displayed as the textarea with a bold border for the user to edit
You might think there is some kind of *ngIf to toggle between the <p> and a <textarea> but it is not how I did it. Notice that upon clicking to edit, there was no shifting on the UI. The trick is very simple.
There is only one
<textarea>and on the normal rendering, I style it to have no border to look like a paragraph. But when you click into that, it is just a normal focus state of the built-in textarea
Source code and demo
- https://stackblitz.com/edit/angular-editable-textbox
- https://jira.trungk18.com/project/issue/6527
- issue-title.component.ts
Editable Textbox
Let see how a normal textarea looks like. Simple write <textarea></textarea>, you will see it as below.
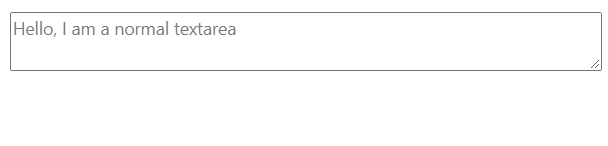
- The
<textarea>tag defines a multi-line text input control. - The
<textarea>element is often used in a form, to collect user inputs like comments or reviews.
As you can see from the normal textarea, it will display the edit cursor only when you focus on the textarea. If you click outside of that, there won’t be any focus. So I will go ahead and style the textarea without the border.
1. No border
Simply add the below CSS to remove the border and have some padding.
.textarea-inline-control {
  flex: 1;
  border-color: transparent;
  padding: 7px 7px 8px;
  line-height: 1.28;
}
Now it looks very neutral, but still, there was a resizer at the bottom right. To remove it, add
 {
  resize: none;
}
2. On hover
When you hover over the textarea, you want to display different background colors. But when you focus on the textarea, you want the background to be white as normal. That’s why I do this CSS to only target the hover state, but not the focus state.
.textarea-inline-control {
  &:hover:not(:focus) {
    background-color: rgb(235, 236, 240);
  }
}
That’s the result. Looks great!

3. On focus
On focus, what we want is to change the border color to be blue. It is pretty straight forward. I also added some more CSS for box-shadow and transition to make the animation smoother.

It is kind of working now, but notice when you press enter to make a new line, the textarea won’t automatically expand to fit the new content. Usually, you can control the size by the resizer or you can specify it by the cols and rows attributes. For example
<textarea rows="4" cols="50"></textarea>4. Textarea auto size
Angular CDK has a text-field package that provides useful utilities for working with text input. One of them was cdkTextareaAutosize
The cdkTextareaAutosize directive can be applied to any <textarea> to make it automatically resize to fit its content. The minimum and the maximum number of rows to expand to can be set via the cdkAutosizeMinRows and cdkAutosizeMaxRows properties respectively.
The resize logic can be triggered programmatically by calling resizeToFitContent. This method takes an optional boolean parameter force that defaults to false. Passing true will force the <textarea>to resize even if its text content has not changed, this can be useful if the styles affecting the <textarea> have changed.
I imported the TextFieldModule into my module and then applied the cdkTextareaAutosize directive to my textarea, that’s all!
<textarea
  [(ngModel)]="text"
  class="textarea-inline-control"
  cdkTextareaAutosize
></textarea>
See the result

5. Emit event onBlur
Now the UI looks very good. What you need to do is simply listen to the onBlur event of the textarea and then somehow emit it to the parent component, or dispatch an event to update from there. That part I leave to you like the homework 🤣 That’s how I did for the issue-title
export class IssueTitleComponent implements OnChanges {
  @Input() issue: JIssue
  titleControl: FormControl

  constructor(private _projectService: ProjectService) {}

  ngOnChanges(changes: SimpleChanges): void {
    let issueChange = changes.issue
    if (issueChange.currentValue !== issueChange.previousValue) {
      this.titleControl = new FormControl(this.issue.title)
    }
  }

  onBlur() {
    this._projectService.updateIssue({
      ...this.issue,
      title: this.titleControl.value,
    })
  }
}
I simply set up a form control when I received a new value from the parent component, update the issue on the blur. When it is updated, ngOnChanges will be triggered and then set the new value to the control If there are any changes. Pretty simple, no? 🤣
That’s all for the fourth part. Any questions, you can leave it on the comment box below or reach me on Twitter. Thanks for stopping by!
Published 5 Sep 2020